Fix It Friday will feature common injuries/difficulties in dancers with a few tips to improve or prevent them!
This is phase 3 of our Achilles Tendinopathy Series! Check out phase 1 here. Phase 2 here.
After you have gone through your earlier rehab for your achilles tendon and are basically pain free, you have to start preparing the tendon for the full demands of dance. You need it to get comfortable with explosive movements, adding more load, and strengthen the rest of the ankle as well. Try out these exercises if appropriate or check out our earlier videos for initial rehab strategies.
- Speed Heel Raise Against Wall: Tendons are meant to handle the forces of jumps, but if you’ve had an injury, the wall helps to offload some weight for early return to jumps. Lean against a wall (the further back your feet are, the harder it becomes) and lean your weight into it. Try to quickly bounce your heels up and down. Start with 5-10 times only and if feeling good after 60 sec rest, you can begin increasing it up to 30 seconds of work over the course of a week.
- Weighted Tib Anterior Toe Lift: Dancers spend a lot of time pointing their toes, but need to balance the muscles that do the opposite movement as well! If you do not have a kettlebell, you can use a band and just have someone hold it or anchor it under something sturdy. You want to slowly lower your toes as much as able (without losing the resistance), then pull the toes up toward your head. Pause at the top and repeat. Initially work lighter weight for higher reps, 20-30, but as it gets easier, slowly increase the weight until 10 reps is challenging.
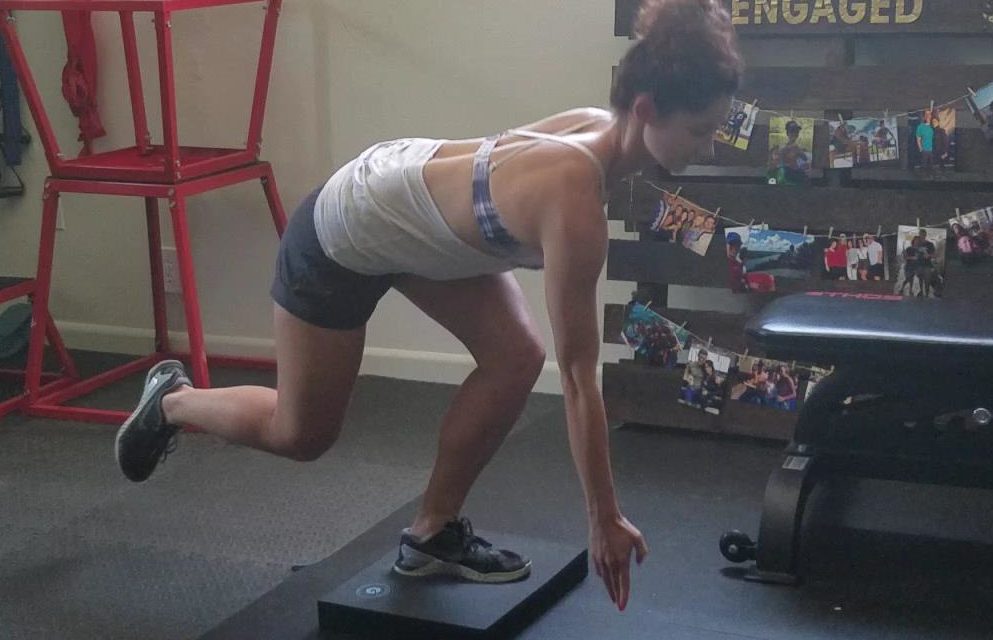
- Foam Forward Floor Touch: This movement gets the whole leg and your balance systems fired up. Your goal is to stand on some foam, a mat, or even a rolled up towel (or flat if too hard) and keep your foot flat (no heel rising off the ground). From here, keep your spine in neutral (flat back), as you bend the hips/knee to tap the floor. You may not be able to go all the way down without rounding your back, so just go as low as able. Start with just 4-5 per side and build up to going lower and up to 10 per side for 2-3 sets.
This is not medical advice. This is general exercises performed for this condition. Please seek professional advice for injuries or pain persisting over time. If general exercise gives you pain, you likely need more specific and direct attention. Take care of your body.
To keep up with our videos, follow along here or on any of our social media platforms.
Scott DPT
#BeyondCrunchesandPilés

